Polarizer Setup for the QPD approach
Quick Start
The QPD page explaining Seth Lindberg's Quick Phase Diagram approach states that a good polarizer box is needed to make it easy to inspect sets of vials or jars. Here are Seth's tips and tricks..
Polarizer
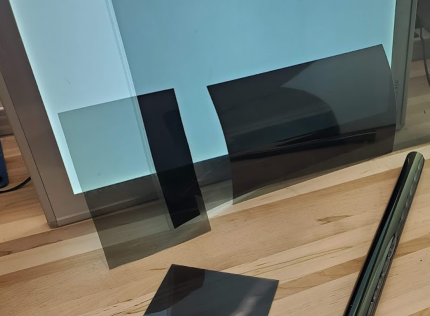 It is a good idea to buy thick polarizer sheets that are stiff enough to stand on their own without curling (sample on left). They can be cut to size and are easy to set up in front of the "light pad" and cross them as in the image. The cheaper thinner sheets (right) or rolls (lower right) of polarizer are less convenient to handle, unless you make a holder for them.
Light pad and light box
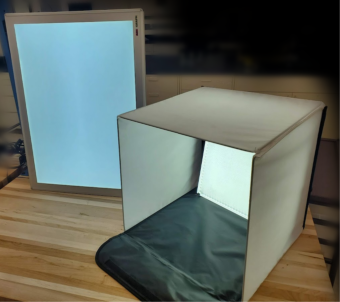 It is easy to buy light pads, simple USB-powered LED sources with a diffuse, even lighting. Many/most of them consist of many square diffusers (visible in the image below), but at normal viewing distances these are of no consequence. The light pads can be used stand-alone, but if you can buy or build a nice light box that means that your lighting is always controlled. A black interior or black flooring further helps you to get clearer photos of your samples.
Crossed polarizers
 The point of crossed polarizers is that they can pick up birefringence very easily. A clear plastic spoon in front of one sheet of polarizer in front of the light pad is of no interest. But with the crossed sheet in front (in this case, held with the fingers), the stress birefringence shows up clearly.
Sample Holder
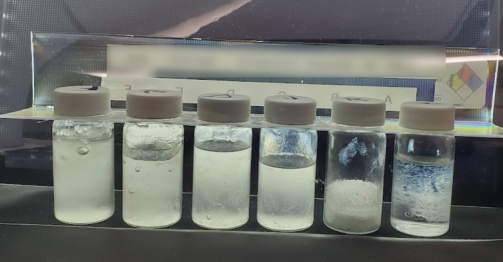 As described on the QPD page, the vials are conveniently held in an L-shaped piece of plastic with holes drilled to fit the open tops of the vials, allowing the lids to be screwed on so that the samples are secure. Now these samples are ready to be placed between your crossed polarizers and, if necessary, given a sharp bash to see if flow birefringence appears.